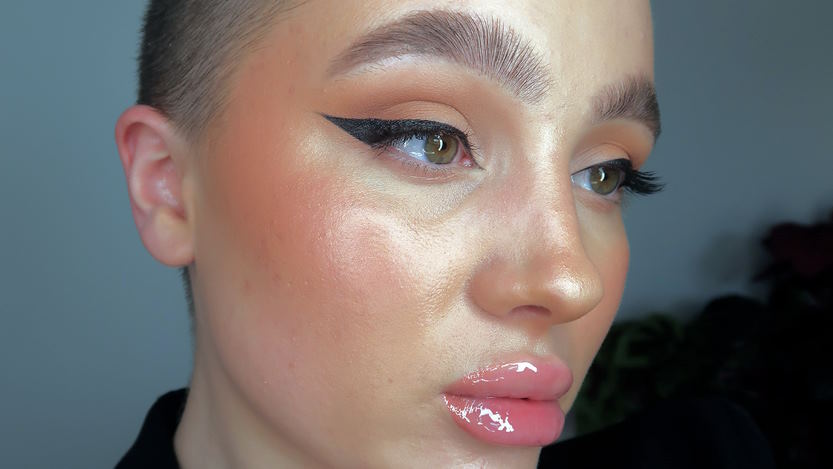
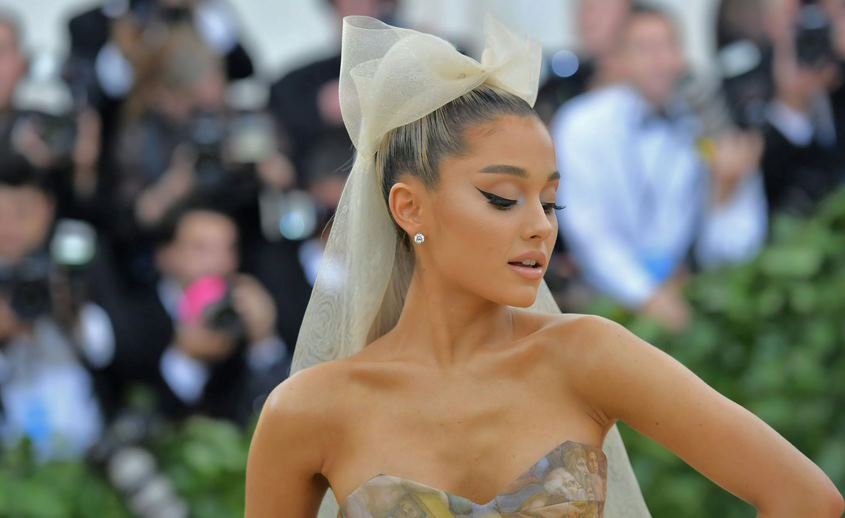
Winged eyeliner is a classic makeup look that can enhance and add definition to the eyes, making them appear more bold and striking. However, achieving the perfect winged eyeliner can be a daunting task, especially for beginners. From uneven wings to smudging and skipping, there are numerous challenges that can arise when attempting to create this look. But fear not, with the right tools, techniques, and a little practice, anyone can master the art of winged eyeliner. So, whether you’re a beginner or a seasoned pro, read on to learn how to create flawless winged eyeliner that will take your makeup game to the next level.
Prepping Your Eyes for the Perfect Winged Eyeliner Look
Prepping your eyes is a crucial step to achieving the perfect winged eyeliner. First, start by cleansing your eyes with a gentle cleanser or micellar water to remove any dirt or oil on your eyelids. Next, apply an eye primer to create a smooth, even base for your eyeliner. The primer will also help the eyeliner adhere better to your skin and prevent smudging.
If you have any dark circles or blemishes around your eyes, it’s best to conceal and set them before applying eyeliner. Choose a concealer that matches your skin tone and apply it under your eyes and on any imperfections using a small brush or your fingertips. Then, use a translucent powder to set the concealer and prevent it from creasing or smudging throughout the day. By prepping your eyes properly, you’ll have a flawless canvas to work with and a better chance of achieving that perfect winged eyeliner.
A Step-by-Step Guide to Drawing the Perfect Outline
Once you’ve prepped your eyes, it’s time to start creating the winged eyeliner look. The first step is to identify the wing shape you want. Do you want a subtle or dramatic wing? A curved or angular wing? Choose a shape that complements your eye shape and personal preference.
Next, draw the outline of the wing using a pencil eyeliner. Start by drawing a line from the outer corner of your eye upwards towards the end of your eyebrow. The length of the wing will depend on the size of your eyes and the wing shape you want. Then, draw a line from the tip of the wing back down to your lash line, connecting it to the outer corner of your eye.
Once you’ve drawn the outline, you can start filling it in with your preferred eyeliner. It’s best to use a liquid or gel eyeliner for a sharp and precise line. Start from the inner corner of your eye and work your way towards the outer corner, following the outline you drew earlier.
Finally, connect the wing to your lash line by drawing a thin line from the tip of the wing to the middle of your lash line. This will create a winged effect and make your eyes appear more elongated. Remember to take your time and use light strokes to avoid any mistakes. With these simple steps, you’ll be on your way to achieving the perfect winged eyeliner.
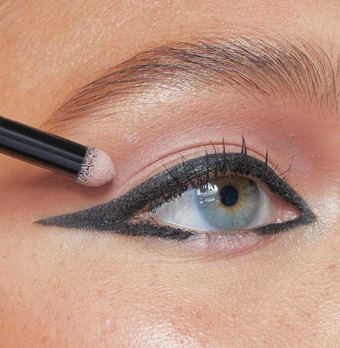
The Art of Filling in the Perfect Wing
After you’ve drawn the outline of your winged eyeliner, the next step is to fill it in with your preferred eyeliner. Choosing the right eyeliner is essential to achieving a smooth and precise finish. Liquid or gel eyeliners are best for this step, as they provide more control and precision. Make sure to choose an eyeliner with a fine-tipped applicator for easier application.
When filling in the wing, start by applying the eyeliner in small, controlled strokes. Work from the tip of the wing and move towards the outer corner of your eye. Use short, light strokes to create a smooth and even line. You can also use a small brush to smoothen out any rough edges and create a more seamless look.
 There are some common mistakes to avoid when filling in the winged eyeliner. One of the most common mistakes is applying too much pressure, which can result in a thick and uneven line. Another mistake is not following the shape of your eye or the outline of the wing, which can result in an asymmetrical look.
To avoid these mistakes, take your time and work in small sections. Use light strokes and build up the intensity gradually. If you make a mistake, you can always use a Q-tip or makeup remover to correct it.
Winged Eyeliner: Tips for the Perfect Finishing Touches
Once you’ve filled in your winged eyeliner, it’s time to add the finishing touches to complete the look. The first step is to touch up any imperfections or mistakes you may have made. Use a Q-tip or makeup remover to clean up any smudges or uneven lines.
Next, apply mascara to your eyelashes to enhance the overall look. Start from the base of your lashes and wiggle the wand upwards to create volume and length. You can also use an eyelash curler before applying mascara to create a more dramatic effect.
If you want to take your winged eyeliner look to the next level, consider adding falsies. False eyelashes can add volume and length to your lashes, making your eyes appear even more striking. There are a variety of false lashes available, ranging from natural to dramatic styles. Choose a style that complements your eye shape and the intensity of your winged eyeliner.
Remember to keep the rest of your makeup minimal to keep the focus on your eyes. You can apply a light blush and a nude lipstick to complete the look.